
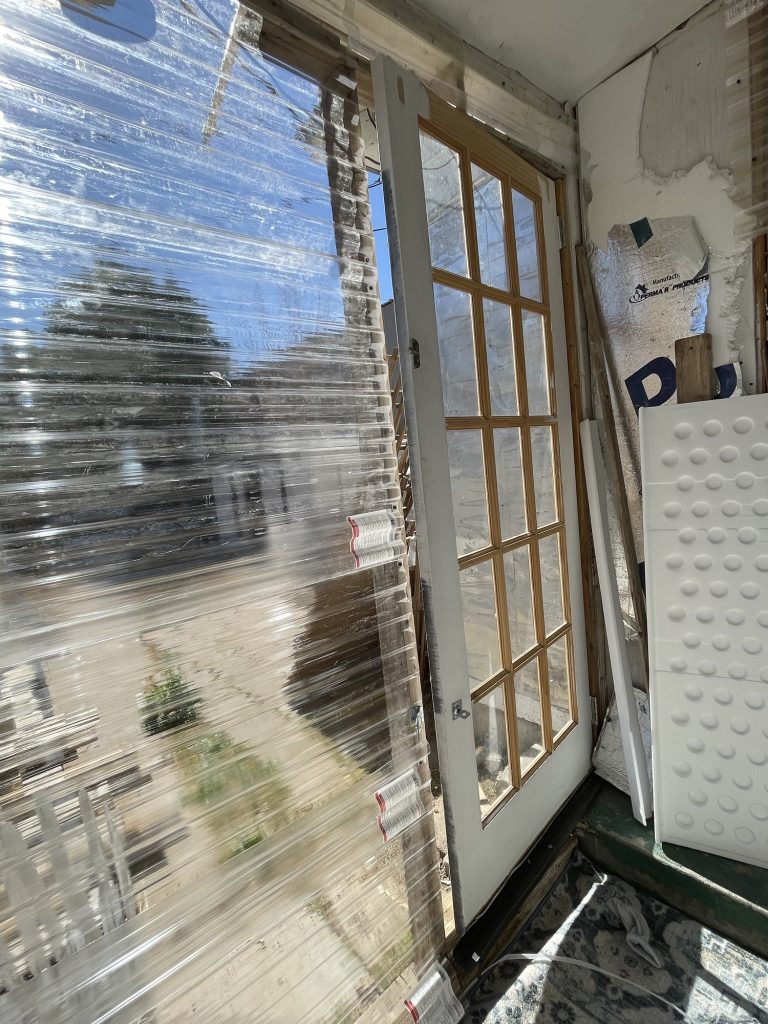


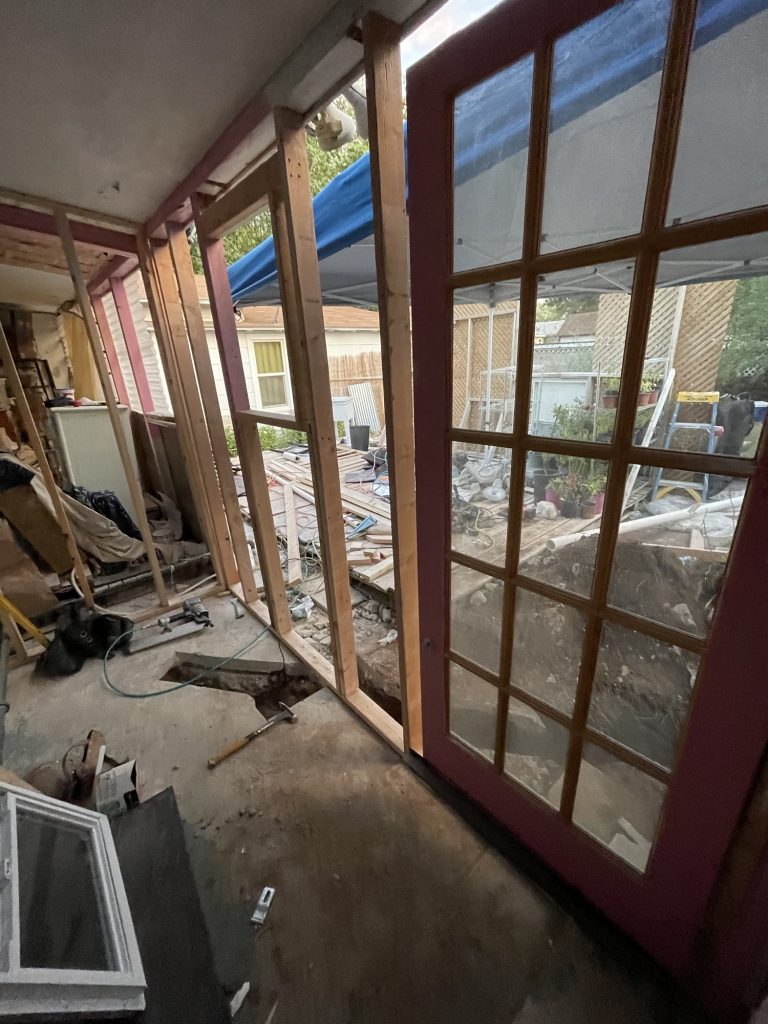
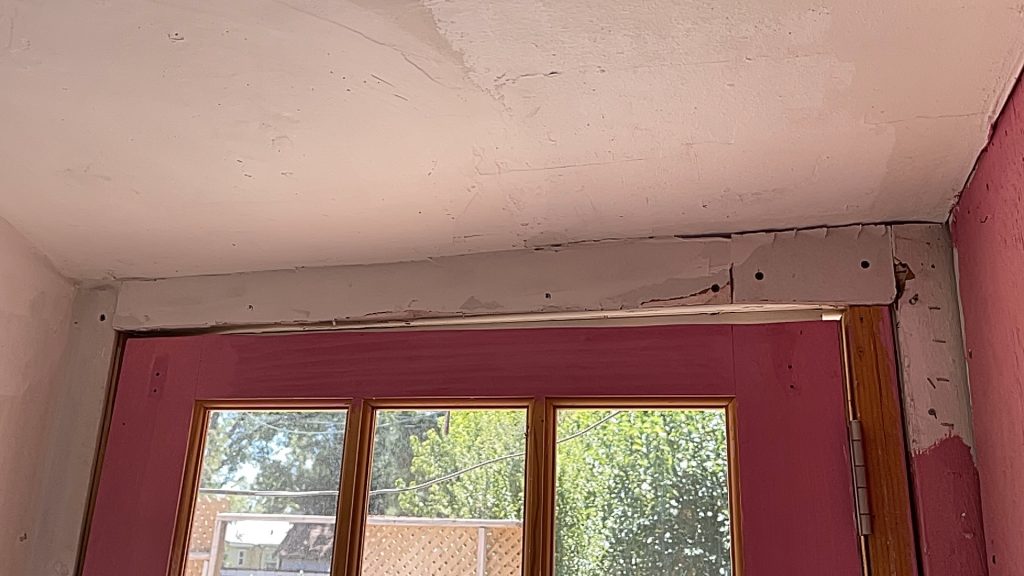
This is what hideous looked like! This is what happens when you do too many things at once! Nothing is organized and then you find a corner and cry. I am trying to get both of these projects done at the same time. I wanted to do before and after pictures like I have seen on other blogs but… mine are too messy! And horrific! They are not as ‘planned out’ as all of the peoples situations are! I decided to do a plexi glass/polycarbonate sheet for a window for now so that I can get the inside done. Then my pink paint fell over and the lid opened up slightly and pink paint spilled out! So then I had to detour and find things to paint pink! That took some time. So now everything is pink. At least I like this color! I added water to the brush each time so that it became more of a pink ‘wash’. Before that I found out how I really lack measuring skills and that my jigsaw blade really bends too much when I try to cut anything. It’s too hot here…in this whole state. I am not done yet! This is still in progress
now my prude and joy project is ruined, unexpectedly. I am getting a bathroom put into this area. They didn’t tell me that they were going to start today. The guy said that my wall was great but then his guys tore it all down while I was picking out a sink at the hardware store. I cried. I think he didn’t u destined that I was really crying because he just laughed at me. The posts that they tore down, I had actually installed several years ago and the looked better then the new ones that they put up which are pretty much in the same place as mine were. Then I saw their hideous, hideous new plywood that they will probably install.
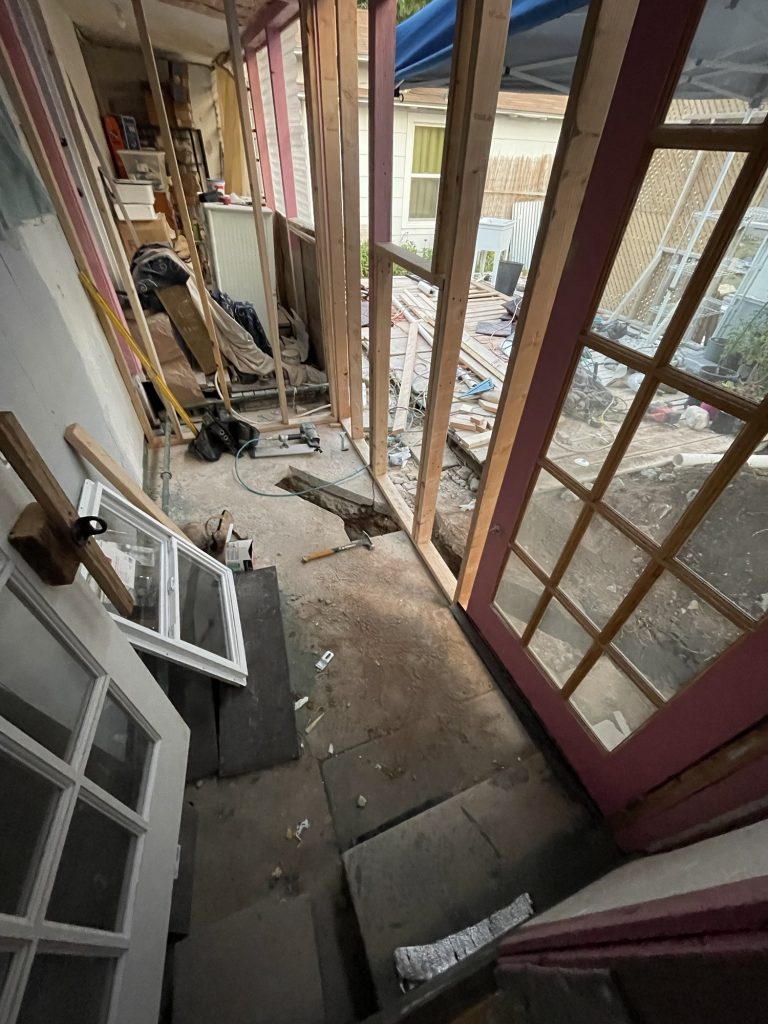
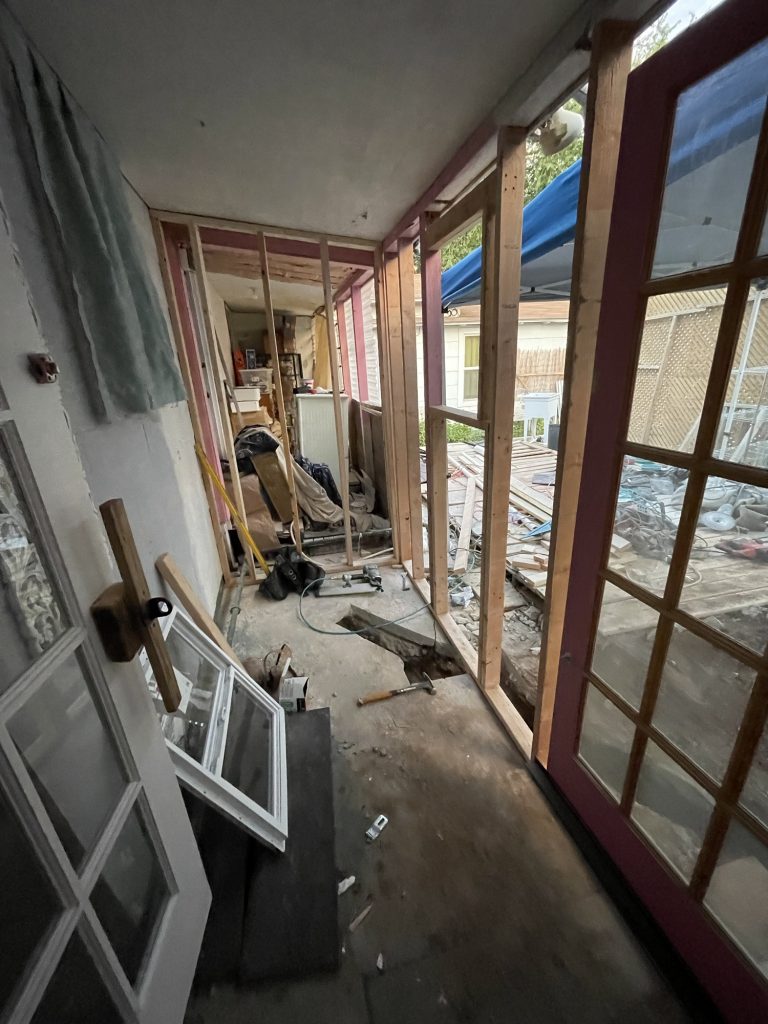
My Pink posts are missing. He said that they put them in the trash and then he said that he mis-spoke. They were perfectly good posts that I had installed and they tipped them out. Now they are missing. I told him that they had to replace them with other 2×4’s if they continue to be missing but he wasn’t pleased. I told him that he did not have permission to take “trash” out of my yard. Then yesterday he said that he wanted to install the bathroom pipes below the ceiling and through the wall in either side. I said NOPE. So these people are supposed to be professionals….how many tears have I cried already???
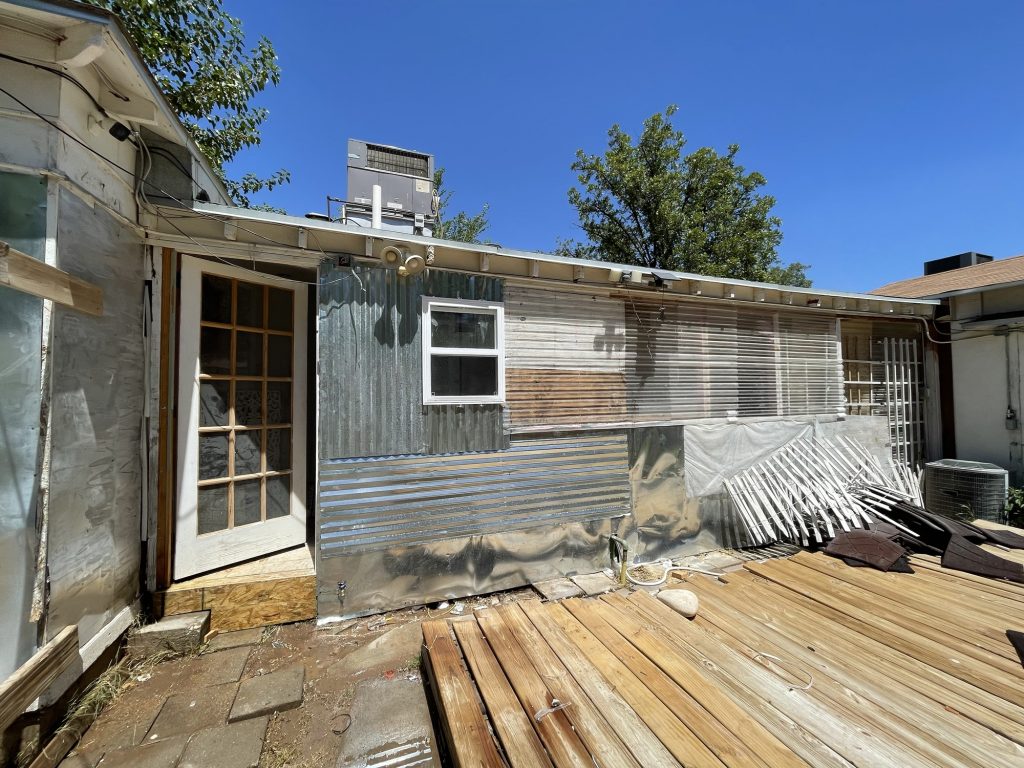

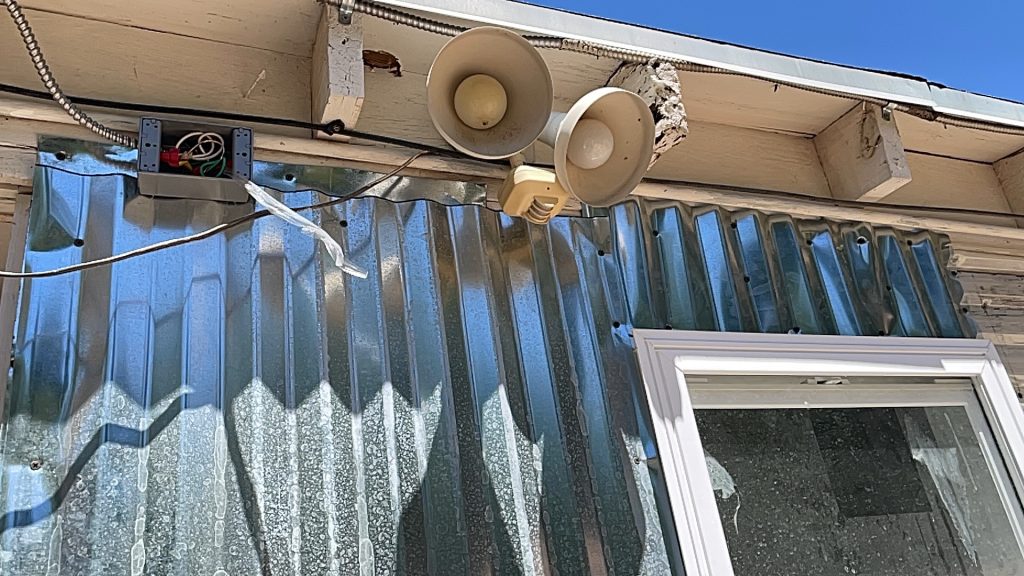
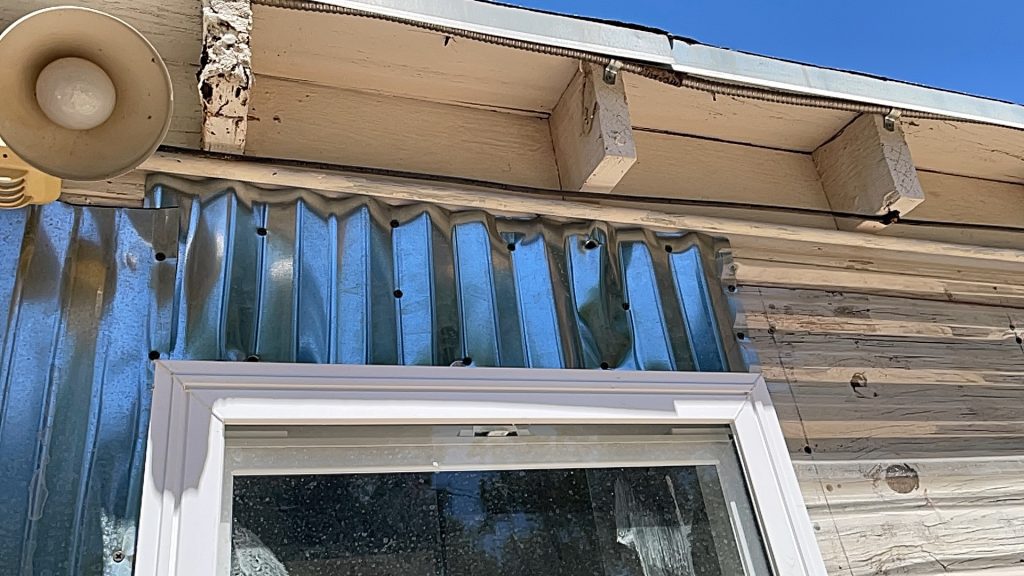
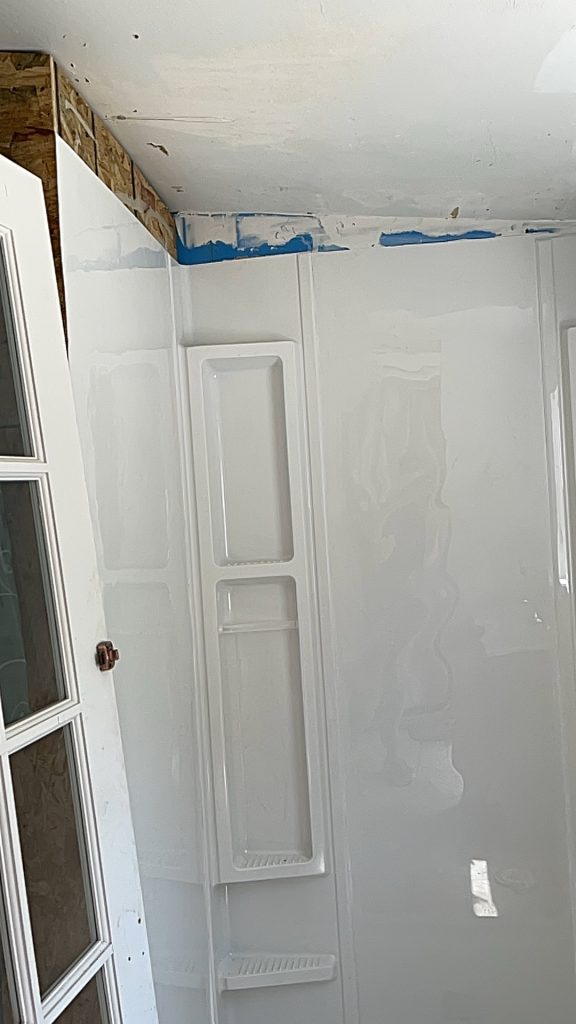
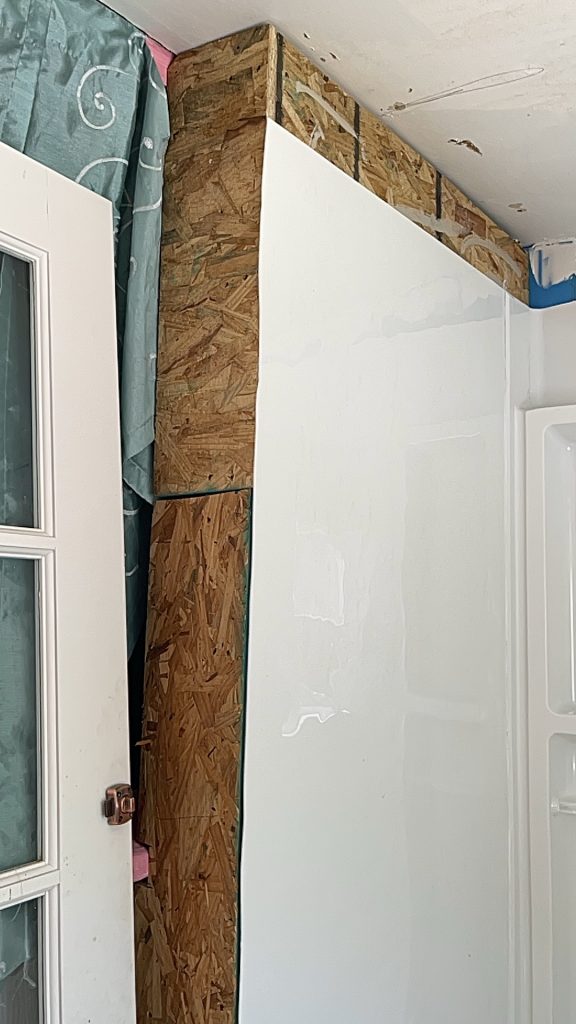

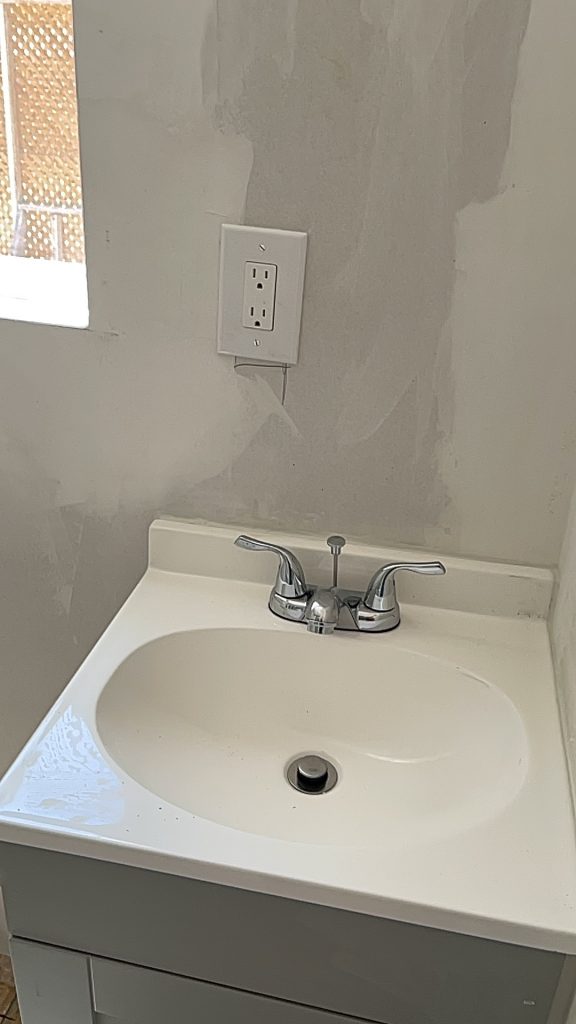
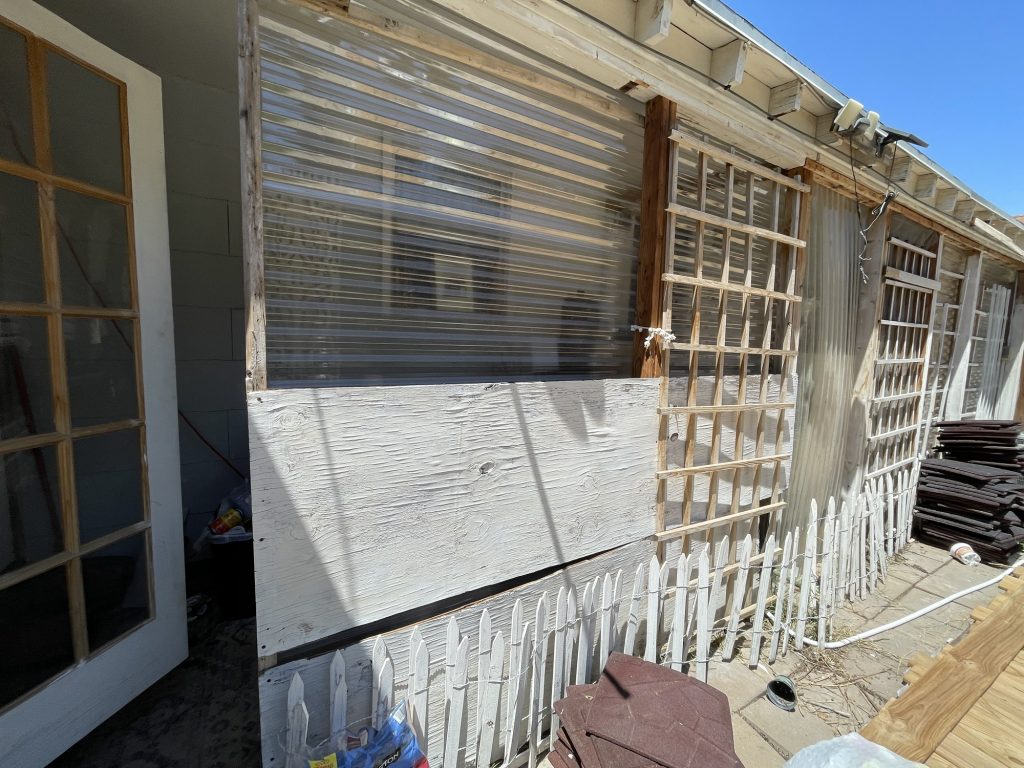
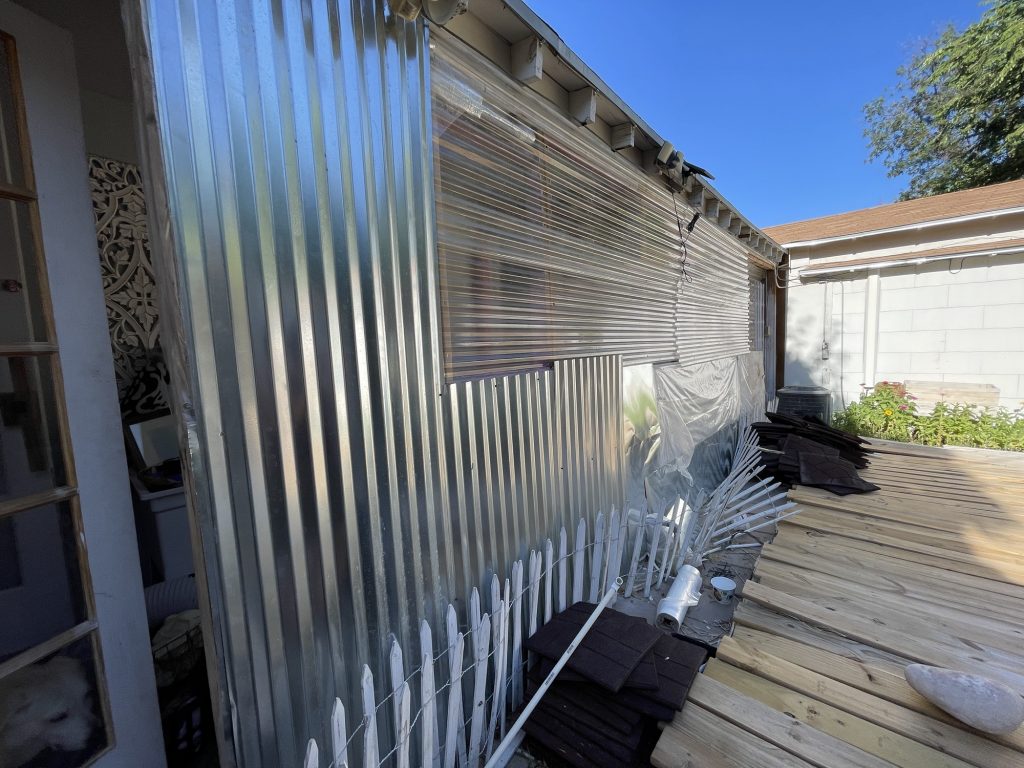
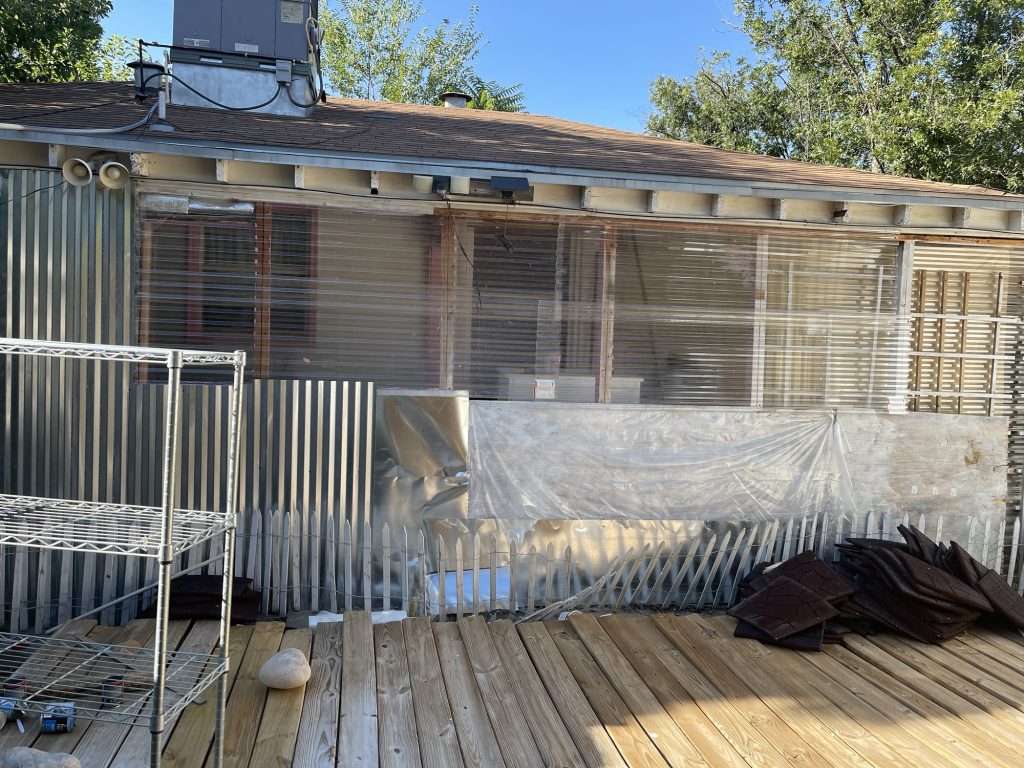
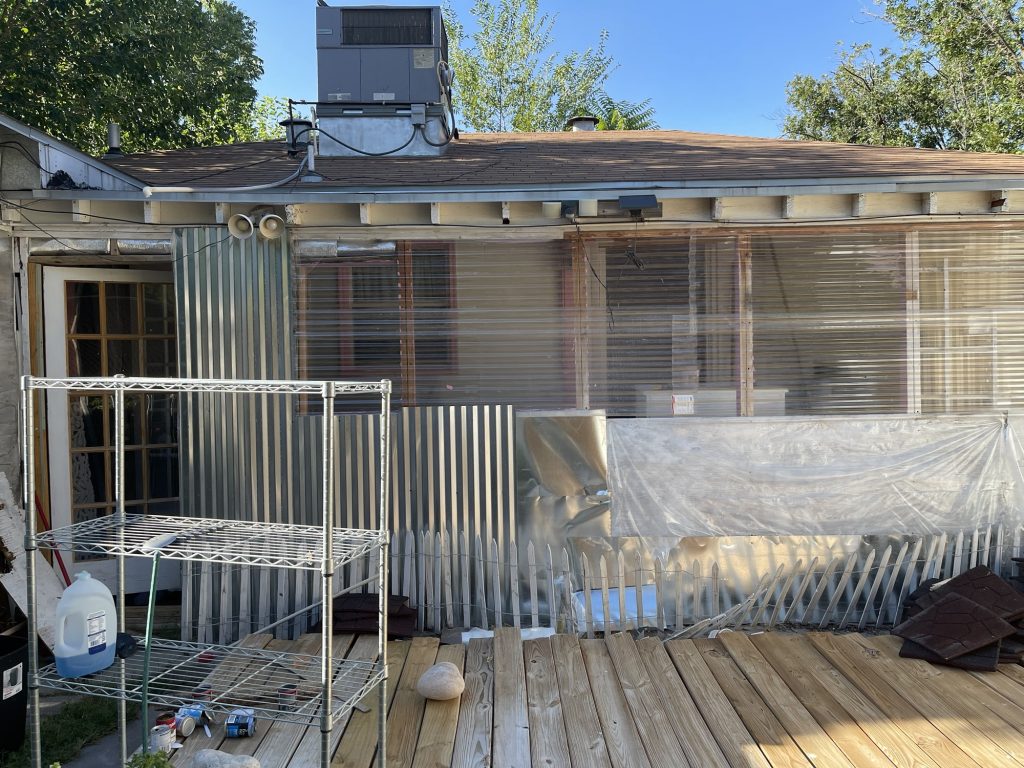
So this is what it is…and I have a lot of words about it but I guess he is done. So I will have to buy the toilet, YouTube it, and install it. I have installed a couple of toilets before but they were over tile and not just the osb boards! I have some extra tile laying around from something else so maybe I can do it DIY?? I told him that when he shows up with the toilet and installs it then I will pay him the other 3700$. I already paid $3000 cash to him for this. He didn’t want to buy the toilet but I bought the sink and a whole bunch of other things that weren’t even apart of the contract!! And I guess a floor wasn’t in the contract…bummer. Did you see the outside wall?? They totally destroyed that wall and then put it back up in pieces😢 they do NOT know how to install the corrugated metal siding. They totally installed it crookedly and not how I had it before and they drilled the screws into deep so now it’s totally bent where the screws are. They are the most hideous people. I hope I never see them again.
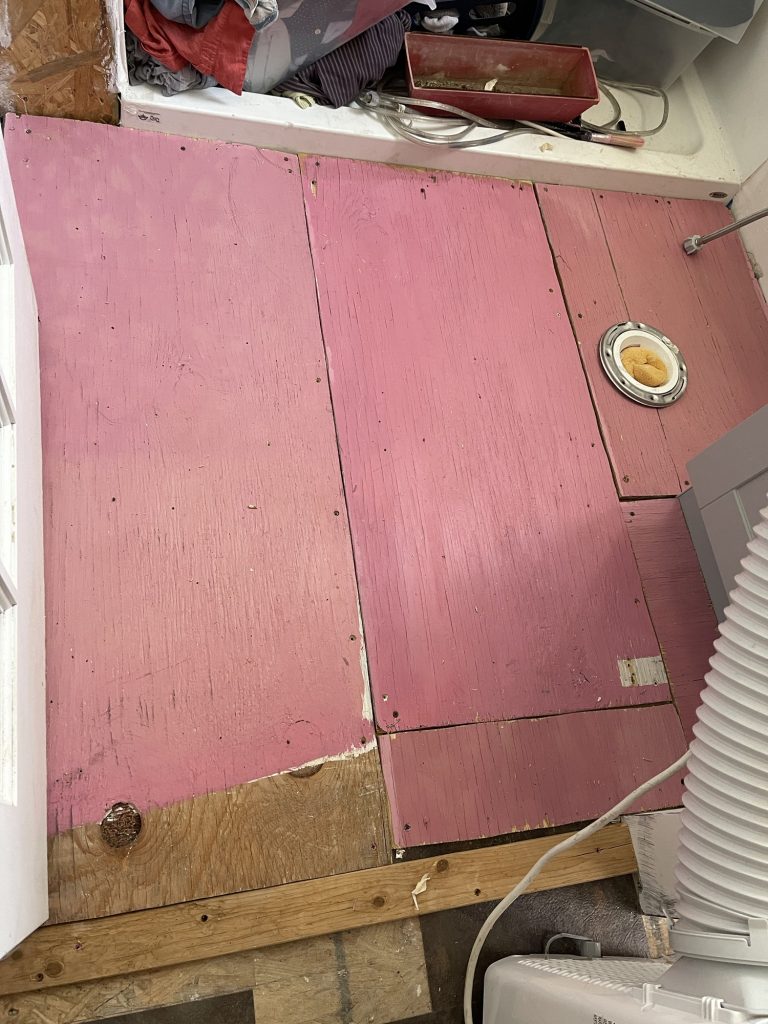
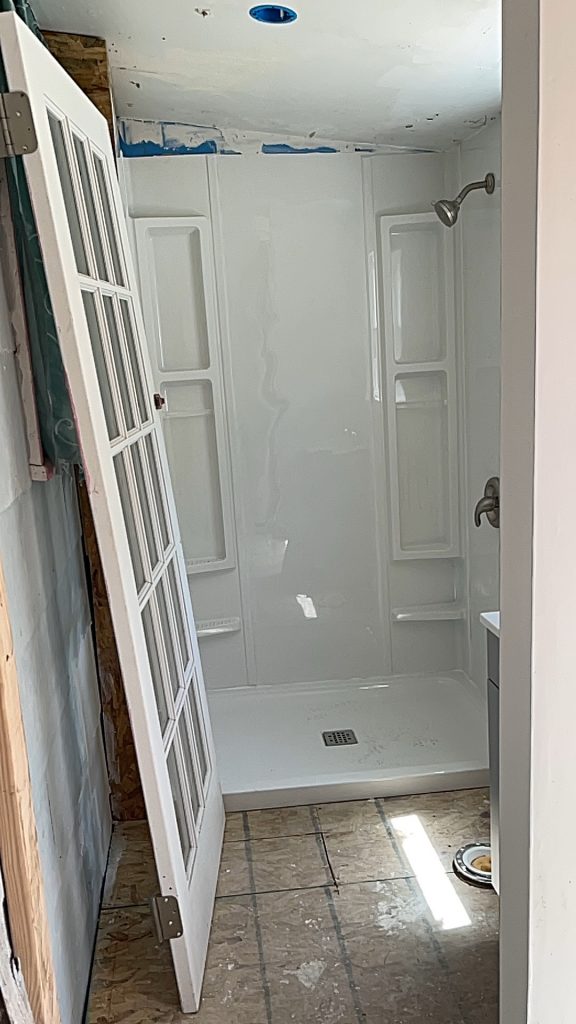
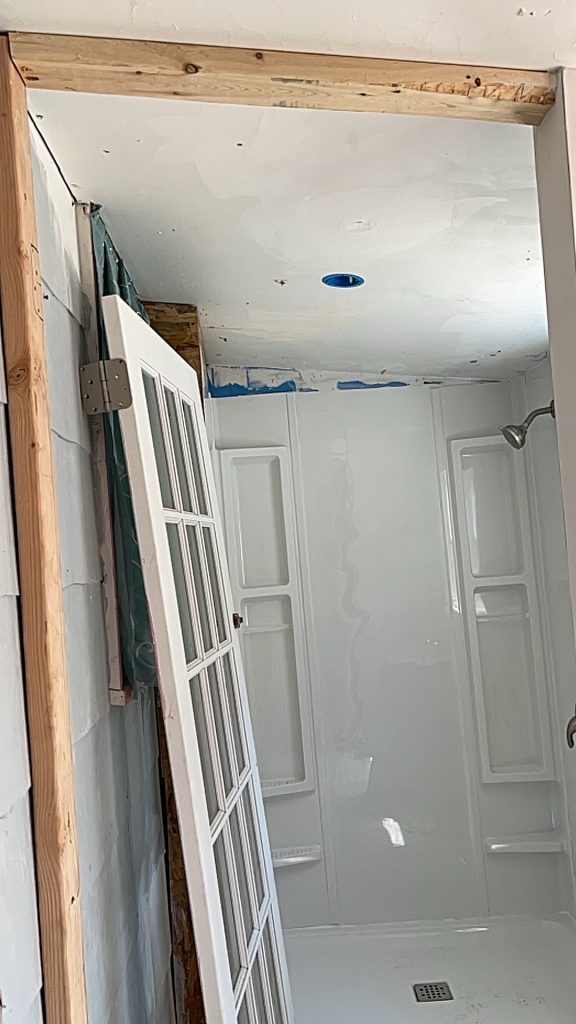
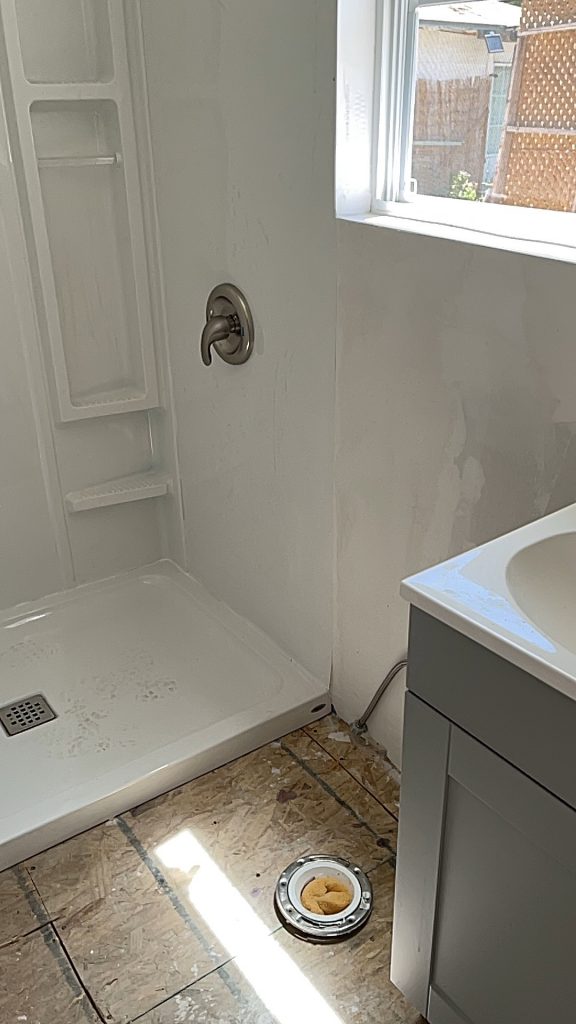
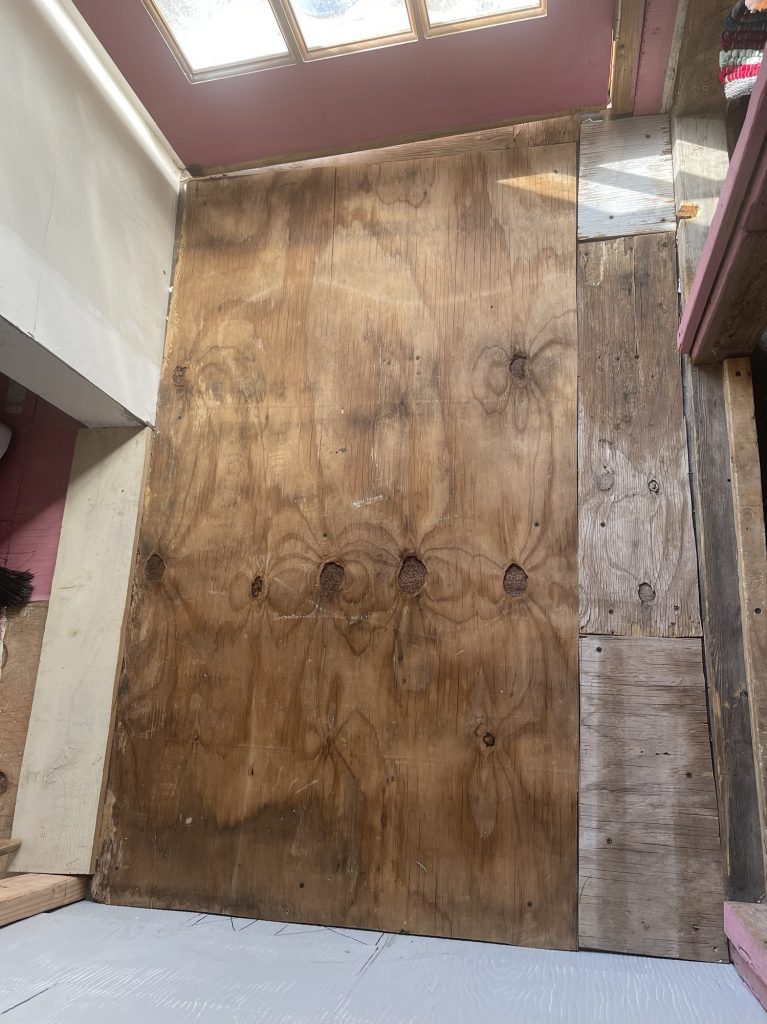
Ok so I’m not a hoarder! I have my clothes in the bottom of this shower…I have to put in a dresser somewhere! Anyway this is the plywood that I happened to have to put over the OSB board. I have read that people actually use plywood for their floors. So I really want a toilet so I decided to do it myself. I also read that you have to put the toilet flange over a finished floor so I hammered in the plywood underneath after I measured the two planks. I cut them in half and measured and cut a semi-circle for each one to put around the flange. The seam for the cut that I made goes the opposite way of the seam that the OSB board has around the flange. It’s really tight! I hope that it’s ok underneath the floor where it continues on to the sewer pipes!! I just have to screw it to the plywood now! Then onto installing the toilet. I thought about installing the peel and stick linoleum. I might do that when I get sick of pink! These pink boards were on my wall that I had framed a long time ago in order to make a closet on the back porch so that I could make the laundry room into a bedroom. I read that a bedroom only has to be 70 square feet and it has to be at least 7 feet long length wise, and have a window. For fire safety.
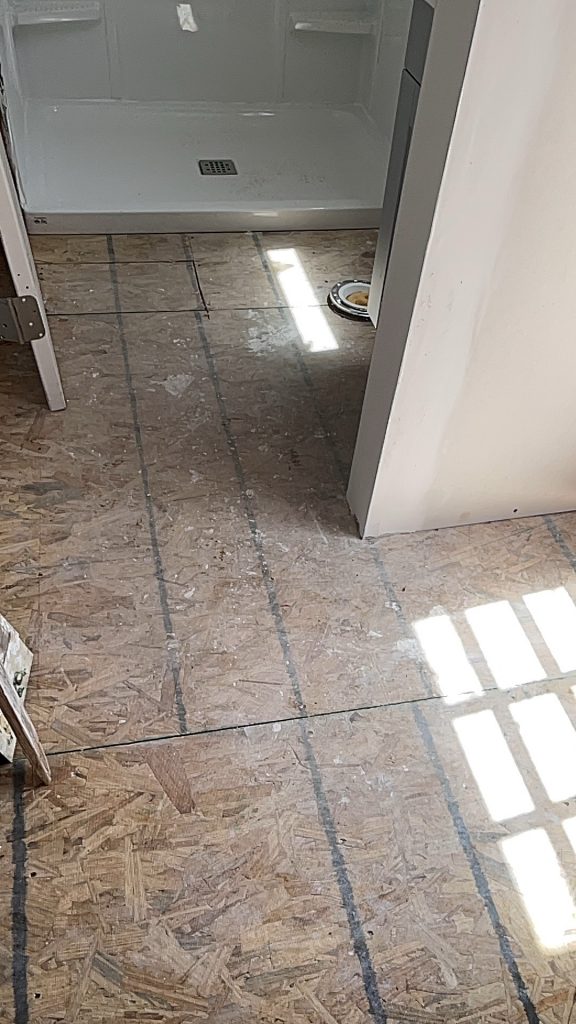
Here is the small entry way! I finally got the plywood measured and cut to screw on top of the OSB board. Then I am going to paint it so that the linoleum will stick to it. It did not stick to the OSB board but for a temporary fix it worked well. I didn’t want to walk on the OSB board.
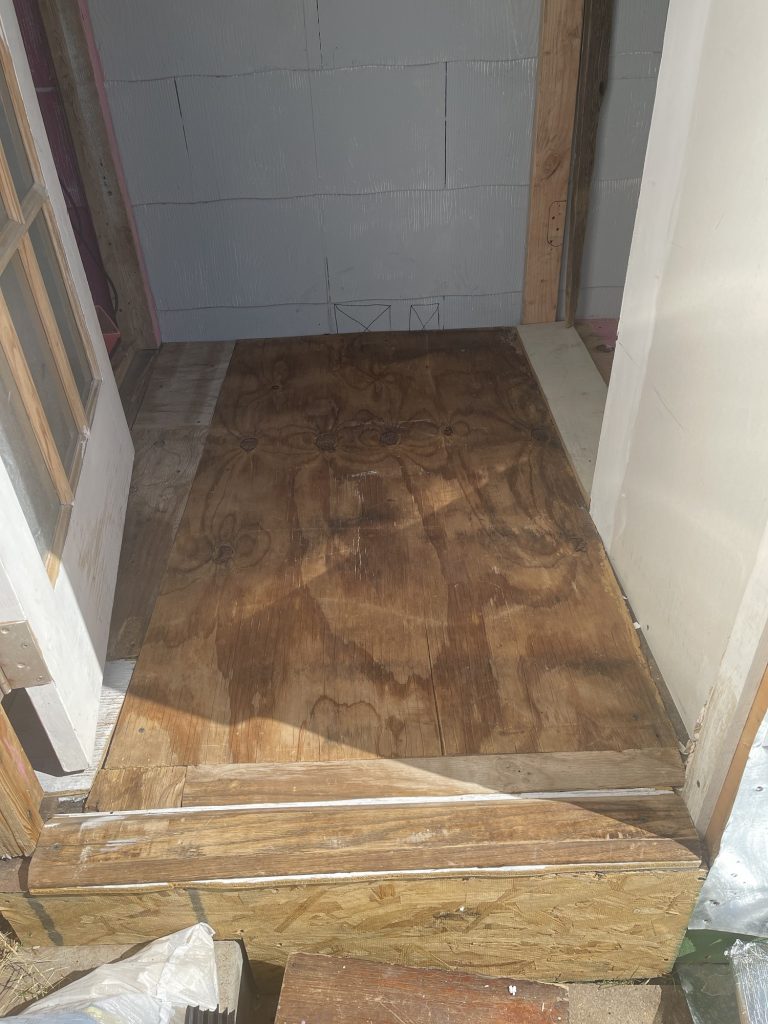
I put the plywood under the thresholds. One threshold is from another door that I didn’t need there and the other is just a shelf that broke in half so jigsawed it. This whole floor took me forever because nothing was evenly done in the first place! I believe it was a couple of hours for each room. I am not tiling it so I do not have to use the cement boards. Yesterday I was walking my two dogs after retrieving Baby by the park (she had gotten out because I had forgotten to lock my door when I and a roommate were trying to screw in a door into another frame elsewhere) and I saw that someone had lined the bottom of their mail box with those cement boards! They had made a box out of them around the bottom. Helpful, if I ever had to buy those I now know what they look like!
Here is my dream come true…
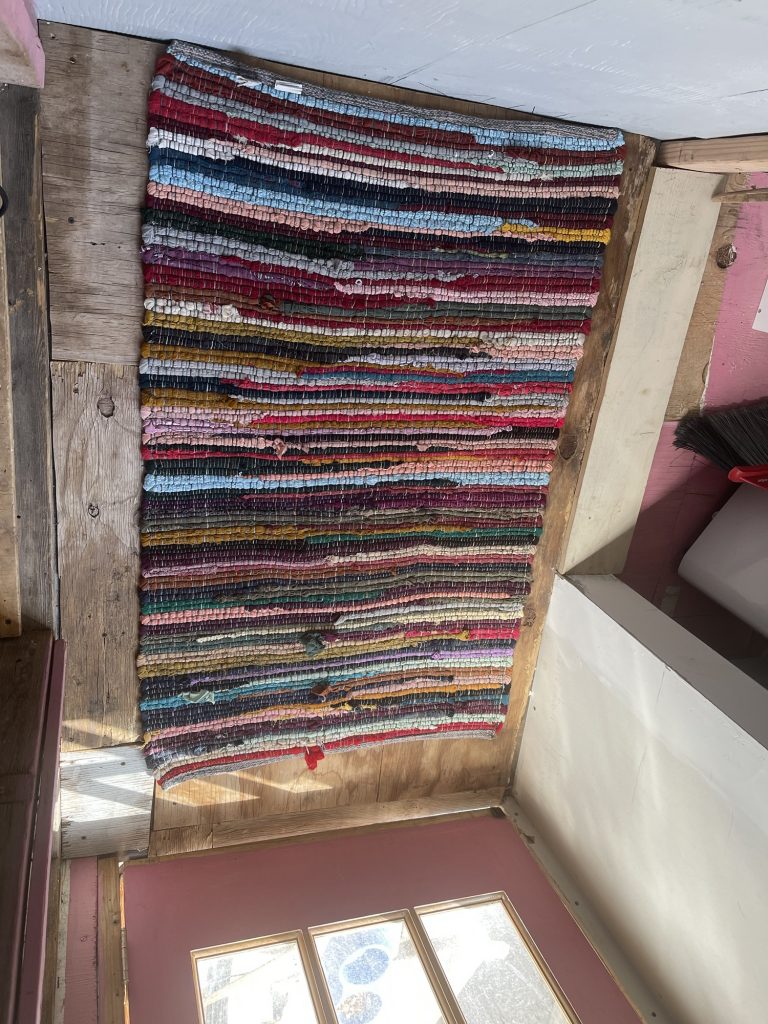

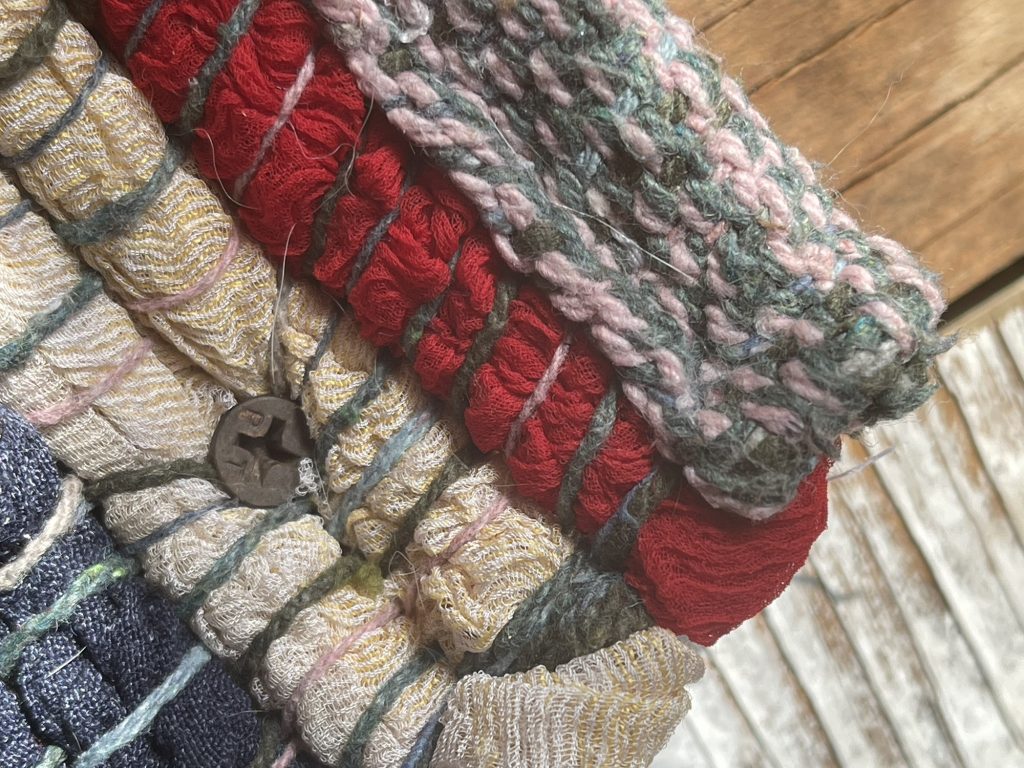
This rug! Kept bunching up and wouldn’t lie flat, so I made it do as I say. I screwed to the floor. When I want to wash it, I just have to remove the screws!
Here is the Peal and stick linoleum that I received this evening! Adorable!
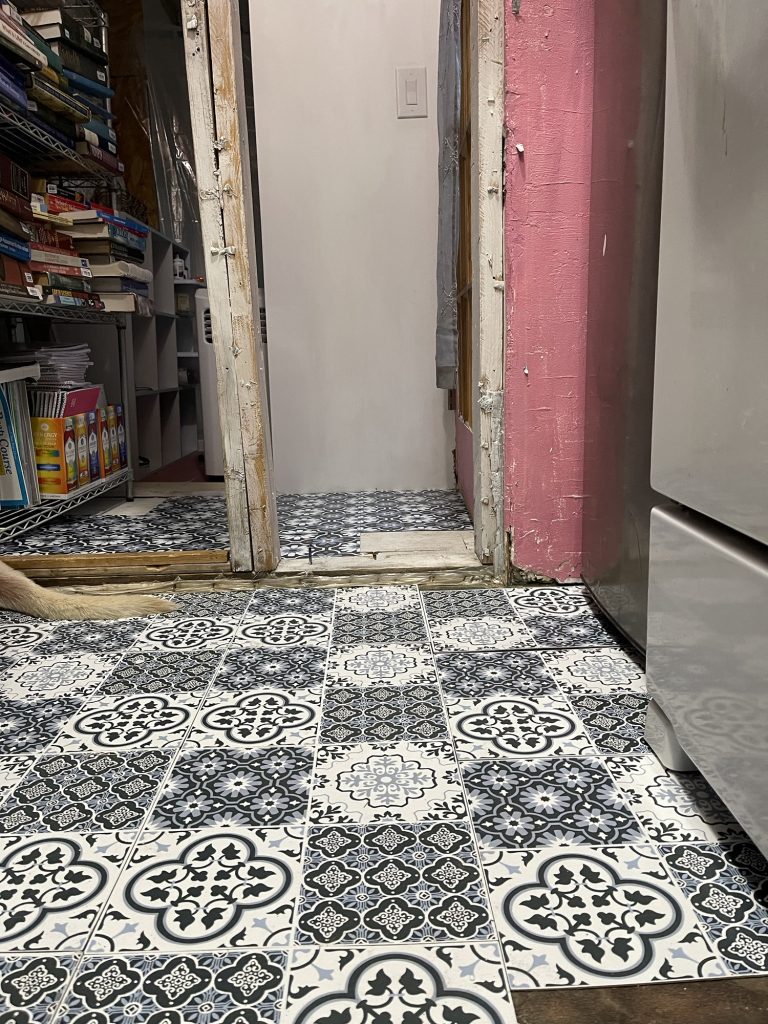
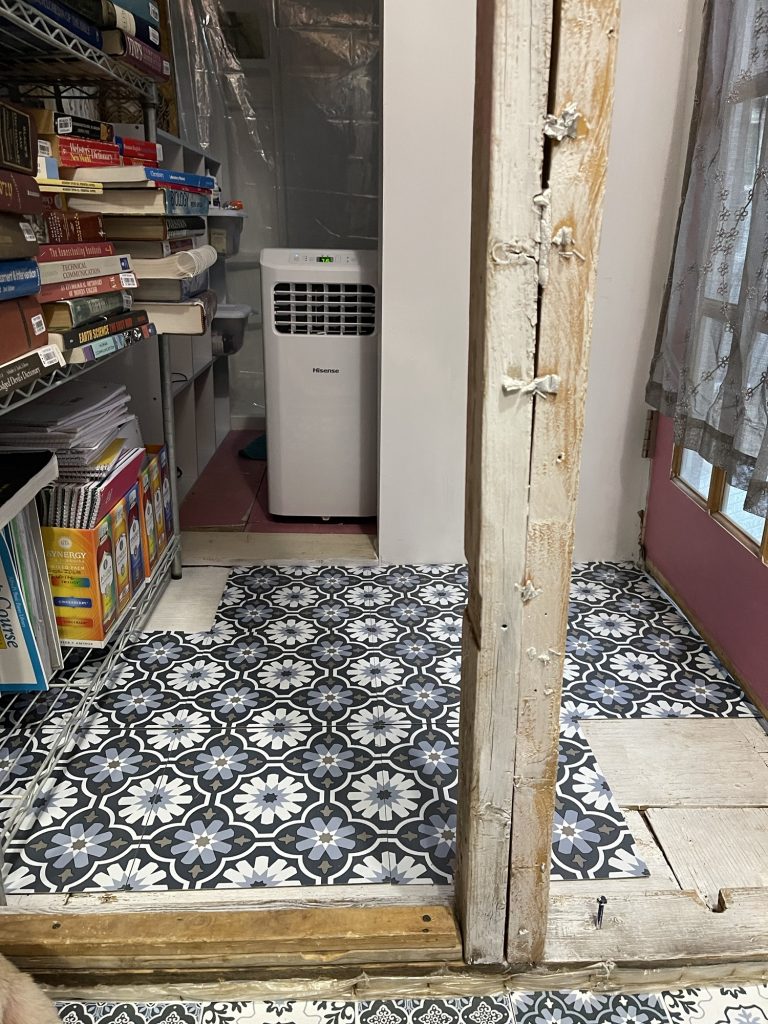
I love it! And it is so easy to put down. Just peel off the back and lay it down. This was thicker than the other linoleum that I bought.
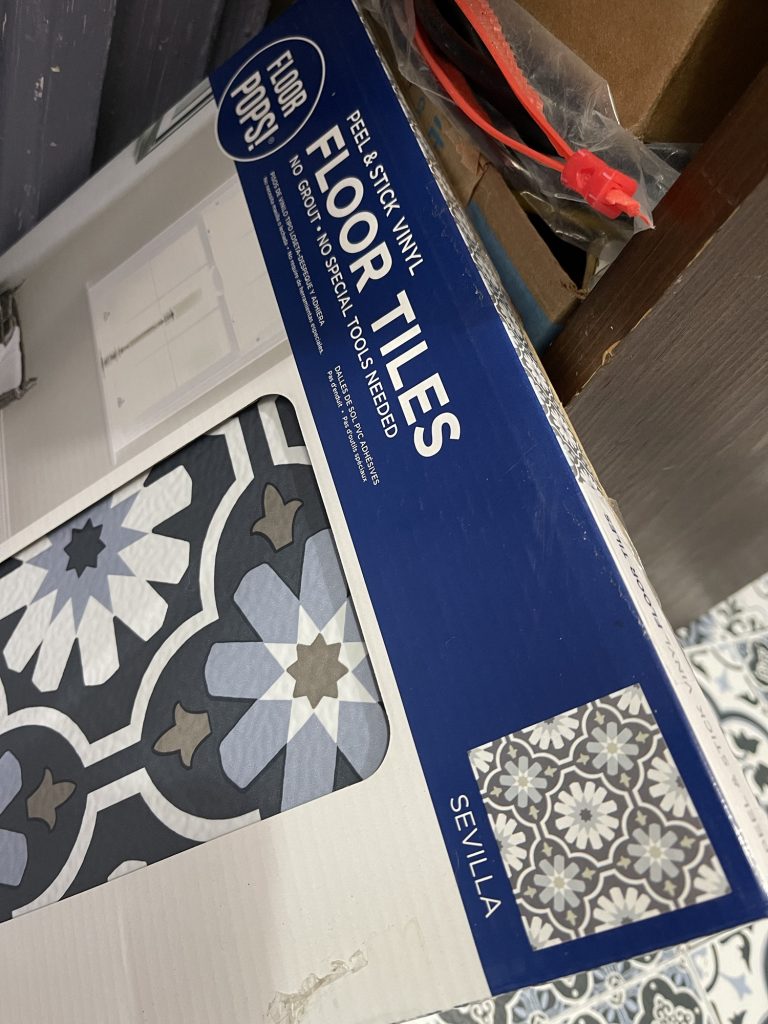
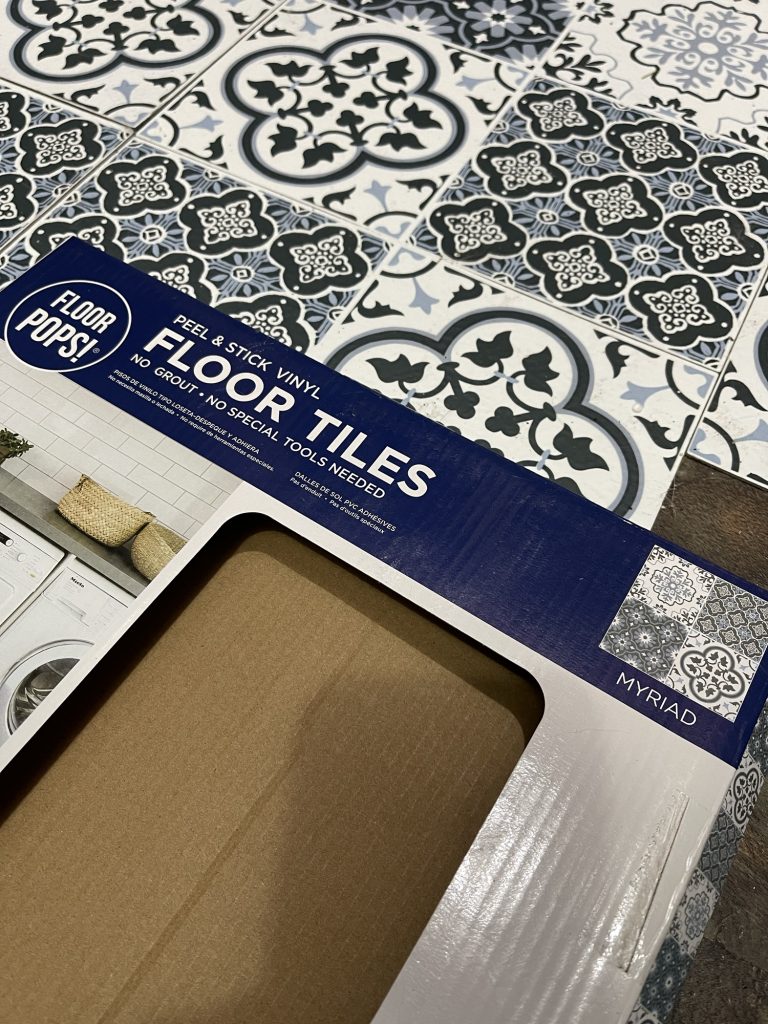
In order to cut them to size you just have to measure the area and then score them on the top along a straight edge and then bend them slightly and they will break at the score. Or just use a utility knife and cut through the entire piece. I like to score them because using a utility knife with that much force can be more dangerous. If you score it then you are lightly using that knife to cut the very top layer of the tile instead of having to aggressively cut through the entire tile at one time. Here is an update on these. They do not stick very well. I am not sure if they would stick better on concrete but on plywood that has been primed they stick, but not well. Maybe add some sort of glue! Here is one suggestion that I have not tried. Take some Elmer’s glue and use a paint brush and glide it on the outsides of the tile. All 4 of the outsides (on the black sticky part) then place it where you want it.
Update* these self adhesive linoleum tiles have ruined my life! Only parts stick down. You have to use glue. I do not like the horrible glue because it makes me so lightheaded. I took some of them back up and used Elmer’s glue and that helped but some of them slid. I used water and primer on some of it but that did not work that well. So now I am gluing them with Elmer’s glue and staggering them on top of the old ones to cover the seams. It’s working way better but you have to use a lot of glue and have something heavy to put on top, Continually moving it around to get all of the edges to stick. I tried to find some different peel and stick at the hardware store but it was all expensive so I found some on sale at Walmart but they only had two boxes left. It’s black and white and I normally don’t choose that for a floor but it was all they had at Walmart. He said that the idea of peel and stick linoleum wasn’t really popular so they may not get any more. Hmmmm….really??
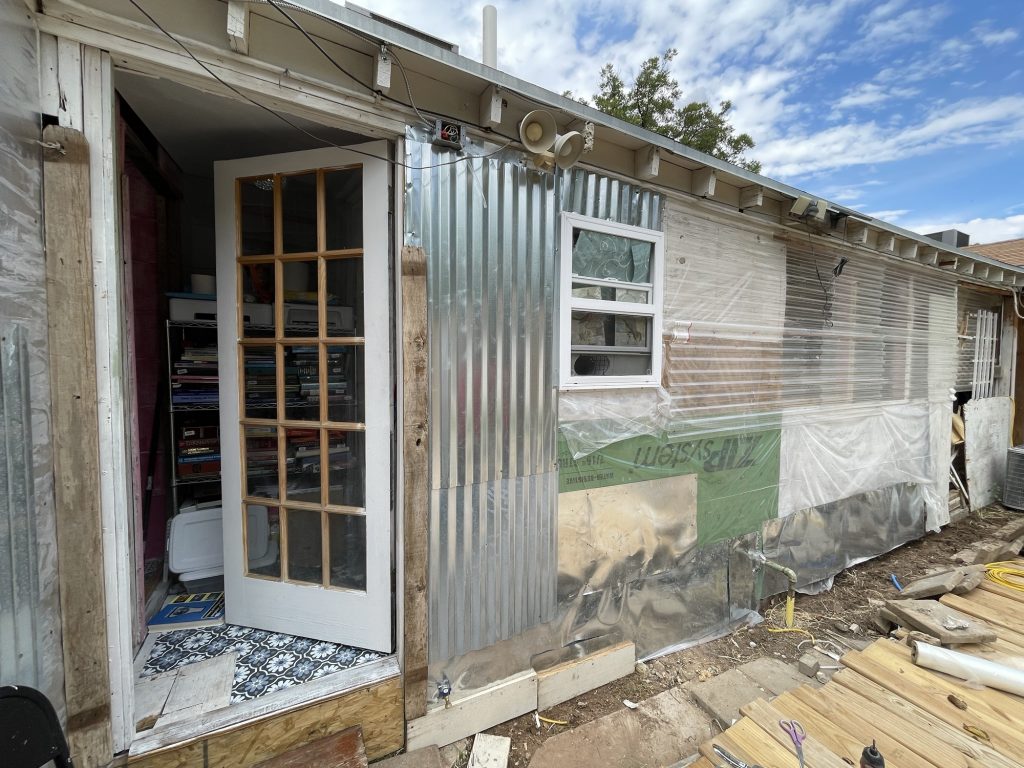
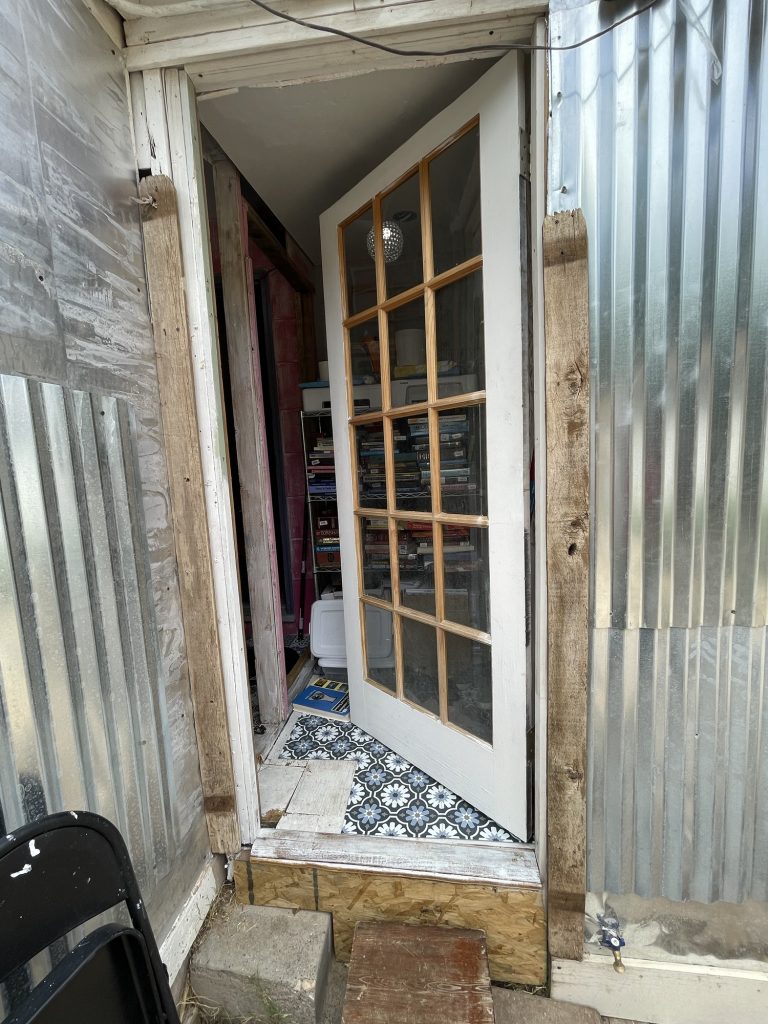
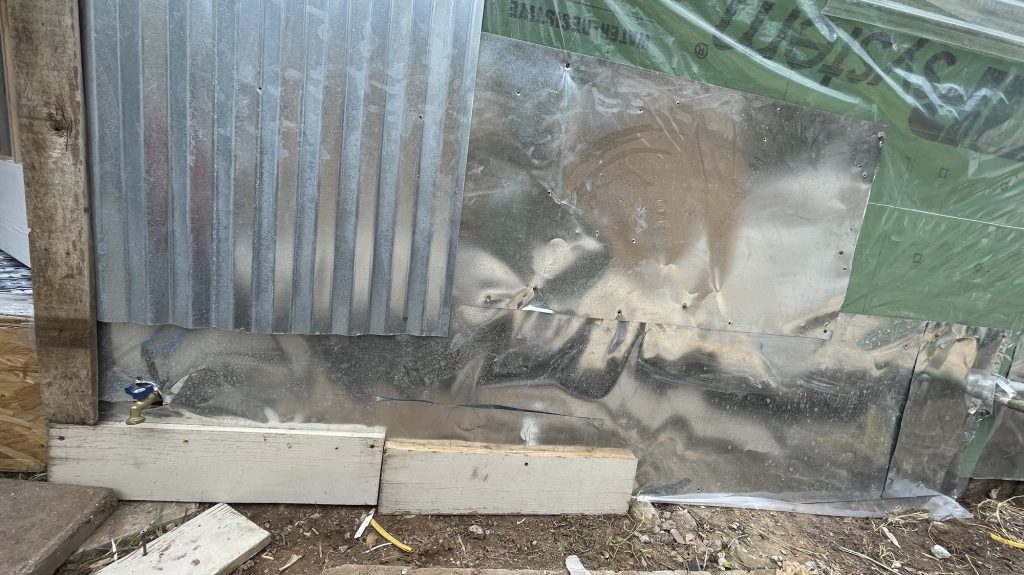
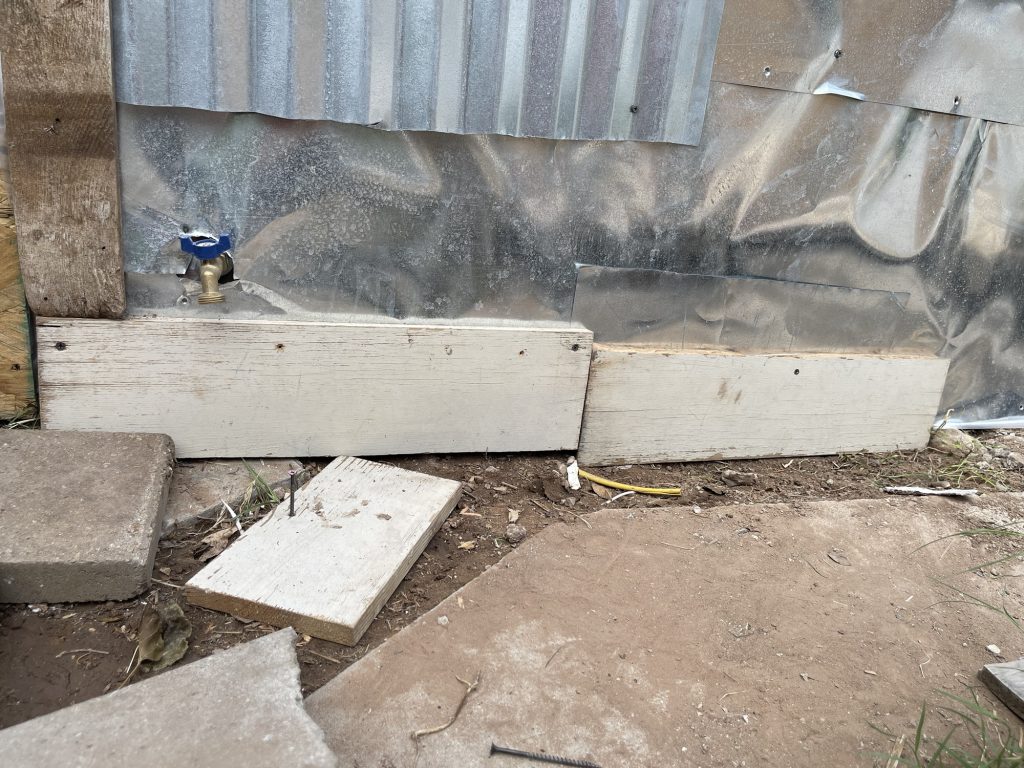
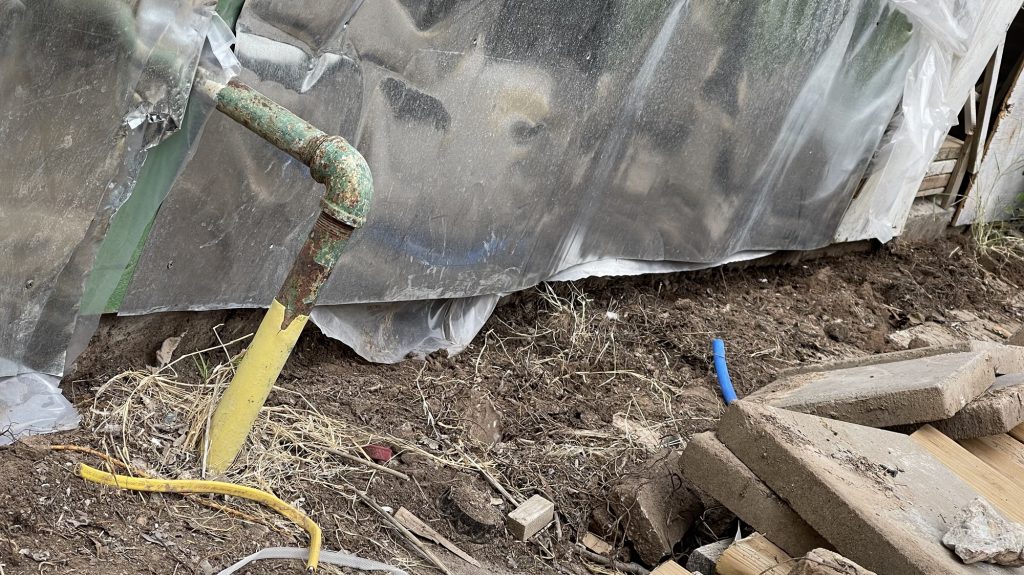
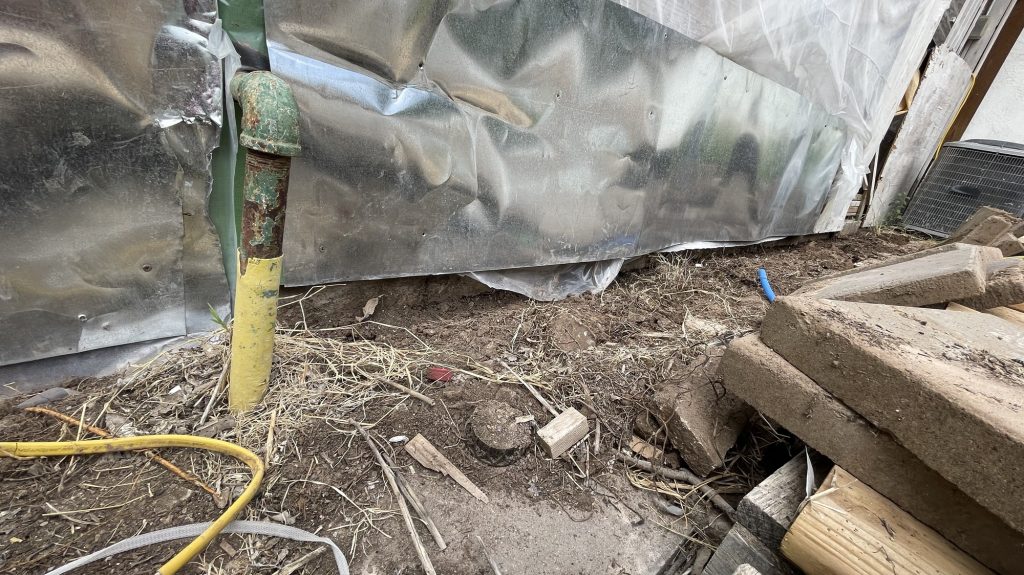
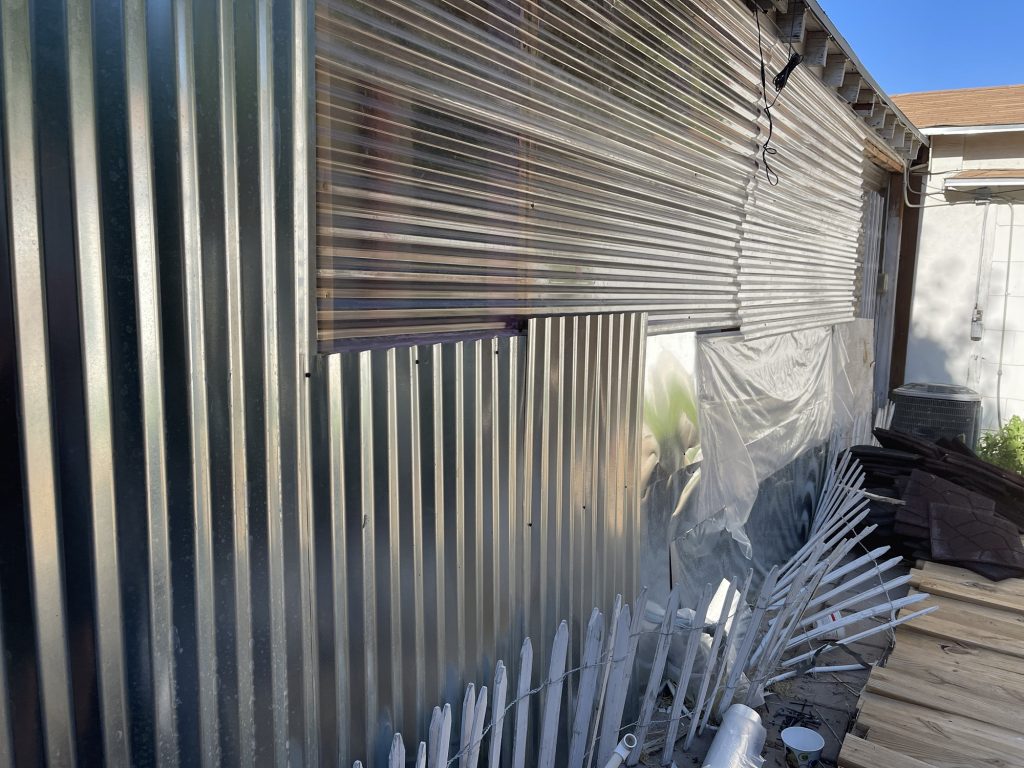
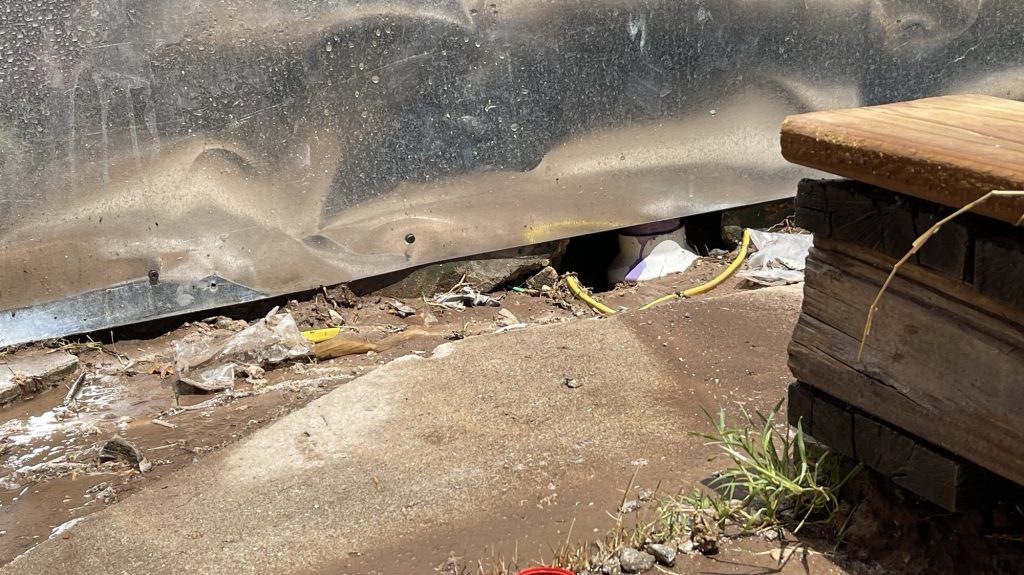
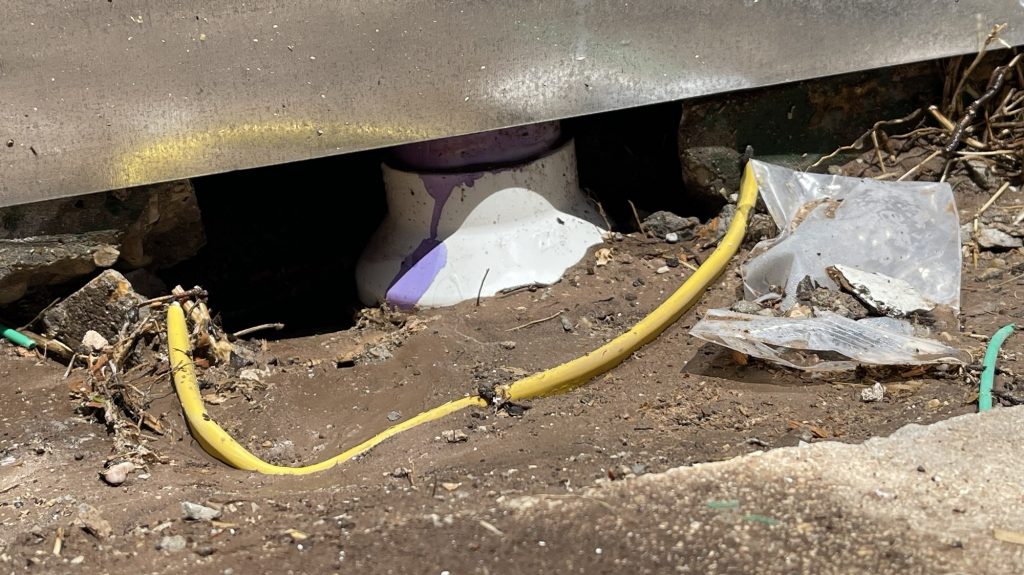
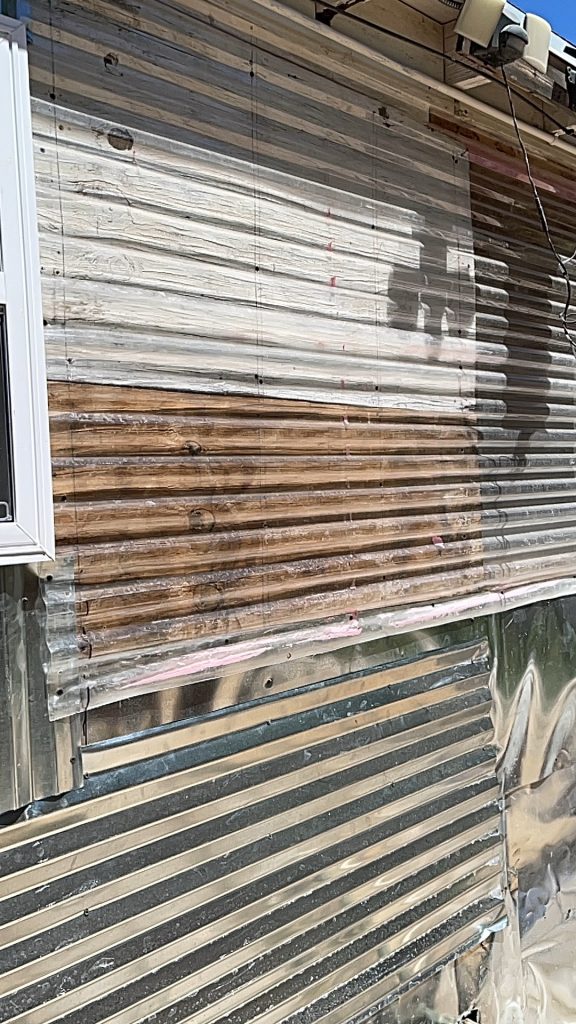
So at the beginning of this post I had some pictures of what I thought hideous was, but what I had done was very nice compared to all of this! Anyway, I figured out how to cover the underground toilet pipe that they had left visible! I dug out a bunch of dirt past the concrete that they had taken out all along the wall. I put an extra layer of sheet metal on top of the other sheet metal that will go down into that dirt all along that wall in front of the broken concrete. I had to take down the top layer of their wall anyway because they had forgotten the plastic layer that is needed to weather proof the wall so it isn’t just plywood then the sheet metal! I am not sure if they forgot that or if they meant to do that. I had to staple the plastic up and then recover it with the sheet metal that they put way too many screws into! I guess they wanted to make designs with the screws in the sheet metal and they screwed the screws in way too far and made holes in the sheet metal. I salvaged it since the corrugated sheet metal is going on top of that, but they did that to my corrugated sheet metal as well. Then I will be putting wood panels that used to be shelves that split in half all along the bottom for further insulation and it will act as another type of siding. Then I will paint them. I used old cedar fencing from a neighbor’s old fence for the frame of the door. I have several more of them that I will cut to finish the frame of the door.
Leave a Reply